
When severe storms strike, roofs often bear the brunt of the damage. Roof tarps offer a temporary solution to prevent further harm before one can make permanent repairs. You will likely be unable to carry out all other repairs yourself. Therefore, it is important to contact a reputable roofing contractor to discuss your options.
In this article, we will walk you through what you need to know about roof tarps. You will understand what they do, how to install one, and their cost. With this knowledge, you can provide temporary protection for your home after a storm.

What Is a Roof Tarp?
A roof tarp is a large, durable sheet made from heavy-duty plastic or polyethylene. It serves as a temporary covering. Furthermore, it shields damaged roof areas from additional exposure to rain, wind, or debris. Roof tarps are typically waterproof and UV-resistant. Thus, they are reliable for outdoor use, even in harsh conditions.
Homeowners use roof tarps to prevent further damage while waiting for professional repairs. After a storm, the roof may be weakened due to missing shingles, cracked tiles, or fallen tree branches. A properly installed tarp ensures no water seeps through the exposed areas. Thus, this reduces the risk of leaks, mold, or structural damage.
How Much Does a Roof Tarp Cost?
The cost of a roof tarp varies based on its size, quality, and the method of installation. The urgency of tarping the roof also affects the overall cost. This is because emergency roof tarping often costs more than standard roof tarping services.
Prices for small tarps (10×10 feet) usually start around $20 to $40, depending on the material. Medium tarps (20×20 feet) typically cost between $50 and $100. Large tarps (30×40 feet) can range from $150 to $300, especially for premium quality.
The quality of the tarp you want to purchase also matters. For instance, you can get cheaper roof tarps that cost $1 per square foot. You can also get a tarp that costs almost $3 per square foot. Their quality will differ because the more expensive one will most likely give you more protection.
Similarly, your roof’s condition will affect the cost of the roof tarp. This is because it costs less to tarp just one damaged area. However, if the storm damage is severe, you will need more materials which translates to a higher cost.
Additionally, labor costs could increase the total price if you hire professionals to install the tarp. On average, professional installation fees range from $200 to $500. This expense covers the use of specialized equipment, expertise, and ensuring the tarp is securely fastened. If you prefer to install the tarp yourself, you’ll save on labor but may need to purchase extra materials, such as nails, ropes, or boards.
How Long Can You Have a Tarp on a Roof?
Roof tarps are not meant to be permanent solutions. Ideally, they should only be in place for a few weeks or months. However, several factors can affect how long a tarp will last:
Weather Conditions
Prolonged exposure to intense sun, wind, or rain can degrade the tarp. In regions with frequent storms, a tarp may last only 30 to 90 days.
Tarp Quality
Higher-quality tarps, especially those labeled “UV-resistant” or “heavy-duty,” can last longer, sometimes up to six months. However, they usually cost more than other types of tarps.
Installation
A well-installed tarp will last longer and provide better protection. Tarps secured with durable materials like wood planks and nails are less likely to shift or tear.
In any case, you should aim to replace the tarp with permanent repairs as soon as possible. This will help you avoid compromising your roof’s structural integrity.
How to Install a Roof Tarp
Installing roof tarps is crucial for preventing further storm damage. Although you can hire professionals, doing it yourself is an option if you follow the right steps carefully. Here are the steps to follow if you want to properly install a roof tarp:
Step 1: Gather Necessary Materials
Before starting, gather all the necessary tools and materials. You will need:
A heavy-duty tarp (ensure it’s large enough to cover the damaged area and extend over the roof edges)
A ladder tall enough to safely reach your roof
Wooden 2×4 planks
A hammer and nails or screws
Utility knife or scissors
Sandbags or other weights (optional)
Double-check that your ladder is stable and can support your weight. Also, if the weather is still stormy, wait until conditions improve before attempting to install the tarp. Safety should always be your top priority.
Step 2: Assess the Damage
Before you install the tarp, assess the damage to the roof. Identify the sections that need coverage. Make sure to check for missing shingles, holes, cracks, or broken tiles. Be aware of any sharp objects like nails or debris that could puncture the tarp.
Once you’ve determined the extent of the damage, measure the area. This will help you choose the appropriate tarp size. It’s always better to get a tarp that’s slightly larger than the damaged section. This will provide extra coverage and ensure a secure installation.
Step 3: Position the Tarp
Unfold the tarp and position it over the damaged area of the roof. Make sure it extends at least 3 to 4 feet beyond the damaged section. Again, this is to provide sufficient protection. If possible, have an extra person help you hold the tarp steady, especially if it’s windy.
Next, align the tarp in a way that allows water to run off the roof easily. The tarp should slope downward toward the edges of the roof. Avoid having it pool in the middle, as water buildup can damage both the tarp and the roof further.
Step 4: Secure the Tarp Using 2×4 Planks
The next step is to secure the tarp in place using wooden 2×4 planks. These planks will hold the tarp firmly. Thus, this stops the wind from blowing it off. It also prevents shifting due to rain.
To secure the plank, take one side of the tarp and roll it around a 2×4 plank. Make sure the plank is long enough to extend beyond the edges of the roof. This ensures maximum stability.
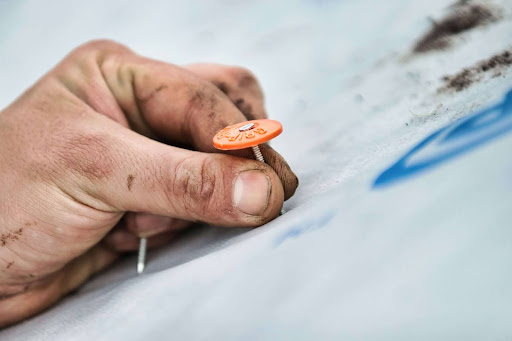
Once the tarp is securely rolled around the plank, use nails or screws to attach the plank to the roof. Place the nails about every 6 to 8 inches to ensure the tarp stays in place. Repeat this process for the other edges of the tarp. Ideally, the planks should form a secure frame around the damaged area.
By using the planks, you prevent the tarp from flapping in the wind and reduce the risk of tears. Additionally, this method allows for a stronger hold than simply using nails or screws on the tarp itself. Doing so could weaken it over time.
Step 5: Check for Gaps and Make Adjustments
After securing the tarp with the planks, carefully inspect the area for any gaps. Even small gaps can allow water to seep through and cause further damage. If you find any gaps, adjust the tarp or reposition the planks.
You can also use sandbags or heavy objects to weigh down the corners of the tarp if needed. These weights will provide extra stability, especially during windy conditions. Avoid placing anything too heavy, as this could damage the tarp or roof structure.
Step 6: Perform Regular Inspections
Once installed, the tarp should provide immediate protection. However, it’s important to check it regularly, especially after storms or high winds. Look for signs of wear and tear, such as rips, holes, or loose planks. Address these issues promptly to maintain the tarp’s effectiveness.
In addition, keep an eye out for water pooling on the tarp. If you notice any, remove the water immediately to prevent further stress on the tarp and roof.
Conclusion
A roof tarp can be a lifesaver after storm damage as it provides temporary protection after a storm. However, you should never use a tarp as a permanent solution. Seek professional help immediately to ensure your house and roof remain in good condition. Furthermore, if you can spare the extra cash, it is best to have a professional install your tarp. This guarantees durability and protection. However, if you would rather install one yourself, follow our guide carefully and you will get the protection you need.
Roof damage is no joke. It can lead to worse issues such as water intrusion and mold. Therefore, professional contractors are your best bet. At On-Site Adjusting, we wear different hats to satisfy our client’s needs. We handle construction work and your insurance claim. Shoot us a quick call so we can restore your home and maximize your claim all at once.