
Frozen pipes are a common issue during the colder months. They can further lead to severe damage if not handled properly. When temperatures drop, water inside your pipes can freeze, causing them to expand and potentially burst. Burst pipes can cause flooding in your home which can, in turn, cause water damage. When dealing with water damage, it is best to hire a public adjuster for help. Public adjusters ensure that your claim is successful and they also help maximize your settlement. Therefore, you should consult one before filing a water damage claim.
This article will walk you through how to safely unfreeze frozen pipes. We will also explain what to do when your pipes freeze and how long it might take to unfreeze. If you’re wondering whether they will eventually thaw on their own, keep reading to find out. With these insights, you can tackle the problem efficiently and prevent further damage.
How to Unfreeze Frozen Pipes
1. Locate the Frozen Pipe
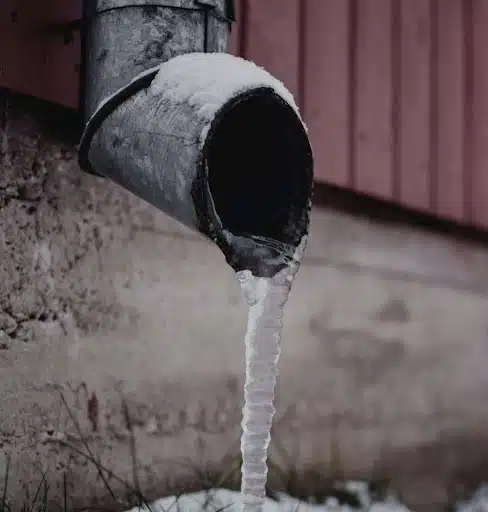
The first step in addressing frozen pipes is locating them. Typically, frozen pipes are usually in unheated areas such as basements, crawl spaces, attics, or exterior walls. However, frozen pipes are not limited to these areas. Sometimes, the pipes in your kitchen freeze and this causes the water to stop running.
To find the frozen pipe, check areas where water flow is slow or has completely stopped. Inspect any exposed pipes and pay attention to any signs of frost or ice on the pipes themselves.
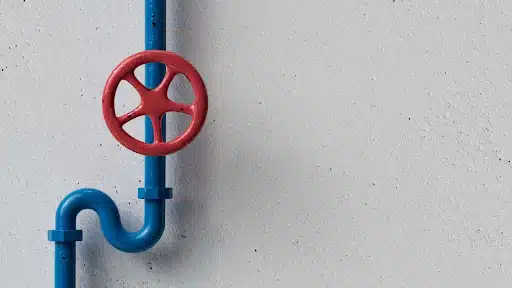
2. Turn Off the Water Supply
After locating the frozen pipe, you should turn off the main water supply. This precaution is vital to prevent potential leaks and flooding if the pipe bursts. Locate the main water shutoff valve. You will typically find the valve in a basement, crawl space, or utility room. Turn the valve clockwise to shut off the water supply.
3. Check for Leaks
Inspect the area around the frozen pipe for any signs of leaks or water damage. If you find any leaks or notice that water is seeping out, take immediate action to contain the situation. Also, place buckets or towels to catch any drips. Furthermore, consider using temporary repair solutions such as pipe clamps or tape until a professional can assist.
4. Open the Faucet
Once you’ve located the frozen pipe, turn on the faucet connected to it. When pipes freeze, a lot of pressure builds up within them. Opening the faucet helps relieve the pressure in the system. As the pipe begins to thaw, water will start to flow through the faucet, which will help prevent the pipe from bursting. Keeping the faucet open also allows for a smoother and more effective thawing process. Additionally, ensure all the water drains completely.
5. Apply Heat Gradually
There are several methods to apply heat to the frozen pipe. Ensure you use each method with caution:
Hairdryer
A hairdryer is a safe and effective tool for thawing pipes. Start by holding the hairdryer a few inches away from the frozen section. Move it back and forth along the pipe. This method works well for localized areas of freezing. Remember to take breaks when doing this to avoid overheating the hair dryer.Heat Lamp
If you have a heat lamp, you can place it near the frozen pipe to gradually warm it up. Make sure you position it safely so it doesn’t pose a fire hazard.Space Heater
You can use a space heater to warm the area around the frozen pipe. Ensure you place it at a safe distance from any flammable materials. This method is useful for thawing multiple pipes at once or significantly larger sections.Heating Pad
Wrap a heating pad around the frozen pipe. Set it to a low or medium heat setting. This method is particularly useful for pipes that are easily accessible.
6. Use a Warm Cloth or Towel
For small sections of pipe, wrapping a warm, damp cloth or towel around the frozen area can be effective. Firstly, soak the cloth in warm water. Then, wrap it around the pipe. Also, re-wet the cloth as it cools. This method can be especially useful for pipes that are difficult to reach with other heating tools.
7. Avoid Dangerous Methods
It’s crucial to avoid using dangerous methods to thaw pipes. Some of these dangerous methods include:
Open Flames
Do not use a blowtorch, propane heater, or any open flame to thaw pipes. Open flames pose a significant fire risk and can cause serious damage to the pipes.Boiling Water
Pouring boiling water directly onto a frozen pipe is not recommended. This is because the sudden temperature change can cause the pipe to burst or crack.Electrical Heat Tape
While heat tape can be effective, ensure you use it according to the manufacturer’s instructions. Improper use will undoubtedly create a fire hazard.
8. Monitor the Situation
Keep an eye on the thawing process. If you notice any changes in water pressure or see any signs of a burst pipe, take action immediately. Continue to monitor the pipe until you’re sure that it has thawed completely and there are no signs of leaks or damage.
9. Insulate Pipes
Insulate your pipes to prevent future freezing. Use pipe insulation sleeves, which are available at most hardware stores. Wrap the insulation around exposed pipes, especially those in unheated areas. This helps keep the pipes warm and reduces the risk of freezing during cold weather.
10. Call a Professional
If you’re unable to thaw the pipe using these methods or if you suspect that the pipe might be damaged, it’s best to call a professional plumber. They have specialized tools and expertise to handle more complex situations safely.
How Long Will It Take for Frozen Pipes to Unfreeze?
The time it takes for frozen pipes to unfreeze depends on several factors. Some of the factors include the severity of the freeze, the method of thawing used, and the pipe’s location. Generally, here are some issues that affect the timeline:
Mild Freezing
If the pipe is only mildly frozen, thawing might take a few hours. Using a hairdryer or heat lamp can also help speed up the process. Make sure to apply heat gradually and monitor the situation closely.
Severe Freezing
For severely frozen pipes, the thawing process might take longer. It could take several hours or even a day, depending on the length of the pipe and the thickness of the ice. Be patient and continue applying heat slowly.
Pipe Material
The material of the pipe also affects thawing time. For instance, copper pipes tend to thaw faster than plastic or PVC pipes. Keep this in mind when choosing your thawing method and also be prepared for varying thawing times.
Method of Thawing
Different thawing methods have different timeframes. For example, a hairdryer or heating pad may take hours, while a space heater could be quicker for larger areas. Thus, adjust your approach based on the method you’re using and the condition of the pipe.
Environmental Factors
Ambient temperature and weather conditions also impact thawing time. If the temperature remains extremely cold, thawing might take longer. Therefore, using multiple heating methods or increasing the room temperature can help speed up the process.
Will Frozen Pipes Unfreeze on Their Own?
In some cases, frozen pipes may thaw on their own without intervention. However, relying on this possibility can be risky. Here’s what to consider:
Temperature Fluctuations
If the temperature rises above freezing, pipes might thaw naturally. However, this can be unpredictable. The pipe might remain frozen for an extended period if temperatures stay low. Thus, it is better to take proactive measures to ensure the pipes thaw safely.
Insulation and Heat Sources
If pipes are well-insulated and exposed to some indirect heat, they may thaw on their own more quickly. However, this doesn’t guarantee that the pipe won’t burst if it froze a while ago. Regularly check the pipe for signs of thawing and leaks.
Risk of Damage
Even if pipes eventually thaw on their own, there is still a risk of damage. If the pipe has been frozen for a long time, it may have already been weakened or cracked. It’s important to monitor the situation closely and take action if necessary.
Professional Help
If you’re unsure whether a pipe has thawed completely or if you notice any issues, it’s best to seek professional help. Plumbers can expertly assess the situation and also address any potential problems.
Conclusion
Dealing with frozen pipes requires careful attention and patience. Start by locating the frozen pipe and applying gradual heat using safe methods. Furthermore, ensure you open the faucet connected to the pipe to help relieve pressure. Additionally, you should monitor the thawing process closely.
If you’re unable to thaw the pipe or notice any signs of damage, it’s important to consult a professional plumber. They can provide expert assistance and help prevent further issues. Also, you should take preventative measures by insulating pipes and keeping unheated areas warm to avoid future freezing.
By following these guidelines and taking prompt action, you can manage frozen pipes effectively and minimize potential damage.
Water damage claims are no joke and dealing with them on your own can be tasking. On-Site Adjusting can take that stressful process off your hands. We have professional adjusters who will handle your claim with expertise and care. We also offer a free consultation for first-timers. Contact us today to get started.